Configuration of a Run Command Tool in Alteryx to run a PowerShell script
In this post, I will describe how to configure the Run Command tool in Alteryx which I recently used in my workflow for a personal project. I spent quite some time setting up the configuration properly and finally started to get my head around it. My focus will be on ‘Write Source’ and ‘Read Results’ settings with the aim to expand on the information provided in Alteryx help.
Overview
Run Command tool in Alteryx allows running external programs within the workflow. For example, we can launch command line or any other installed program like Tableau or 7zip. The tool is located under the Developer category.

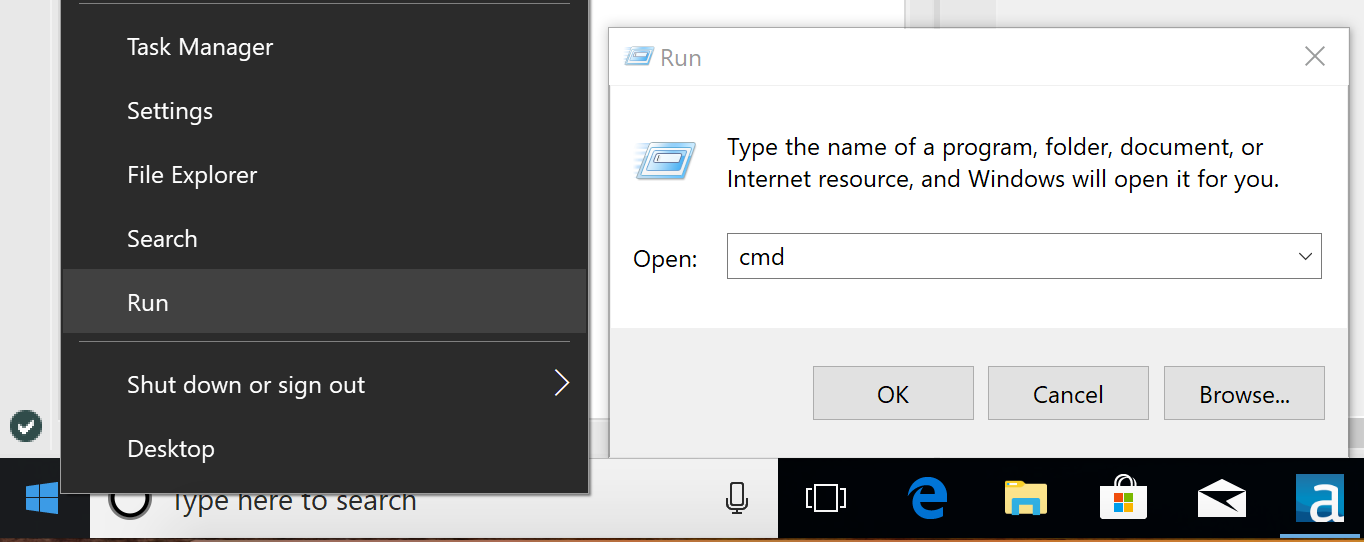
Launching any program through Run Command tool in Alteryx is equivalent to doing this via Windows Run interface.
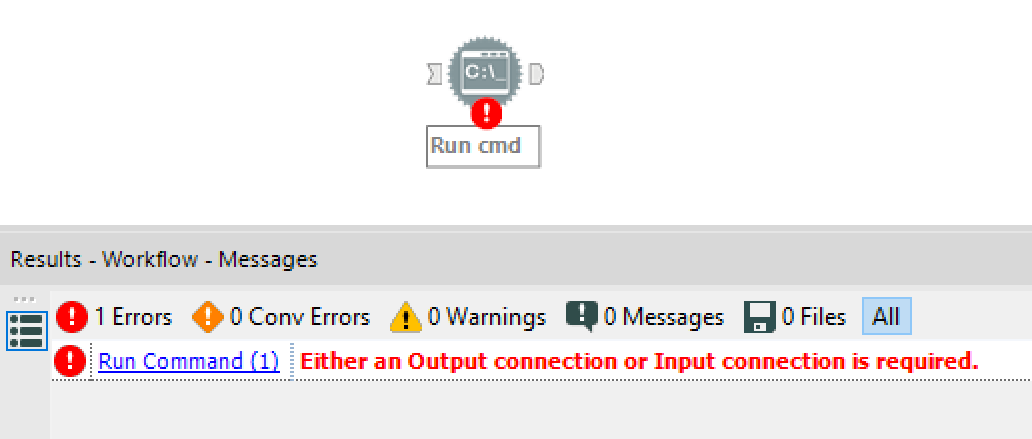
When Run Command tool is on the canvas, both incoming and outgoing connection anchors are grey meaning that they are optional. However, if no connection is set up the following error message will be displayed: Either an Output connection or Input connection is required. This means that at least one connection needs to be configured either incoming or outgoing, or both.
Configuration
The configuration interface of a Run Command tool has several configurable inputs. Many of the settings are marked as optional but I think this is also a little bit misleading. Depending on the use case and on what we want to achieve, we will need to specify different settings. The tricky part is to know when each section needs to be filled in.
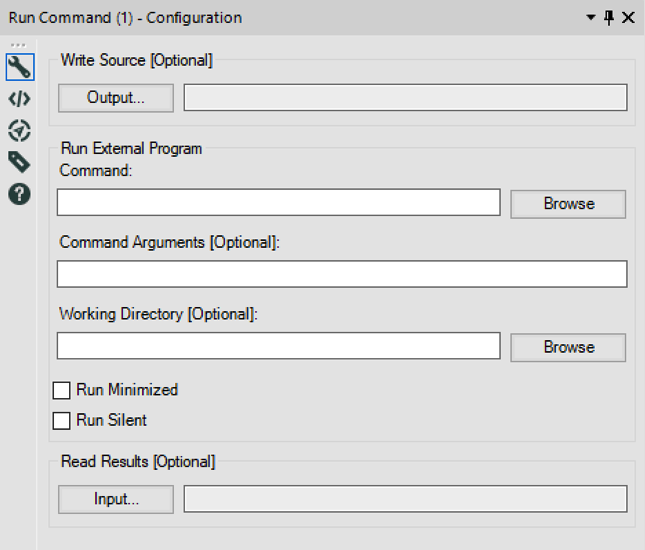
Let’s have a look at what configuration settings I used and why for my recent project.
I created a workflow that downloads .zip files from the internet and extracts them. I also wanted to input data from unzipped files in the same workflow for union-ing into one output file.
I found several workflows on the Alteryx community that unzip files with the help of a batch script and external archiver programs like 7zip. However, I wanted to create this kind of workflow myself using Windows PowerShell to have fewer external dependencies.

Let’s examine the configuration window in more detail starting with the middle section where we specify settings for an external program.
In this example I launch Windows PowerShell. With native Windows applications it is enough to write just the name of the program. If we want to launch a 3rd party program, like Tableau, we will need to specify the exact path to the .exe file. A good practice is to wrap the whole path in quotes just in case there are spaces in folder or file names.
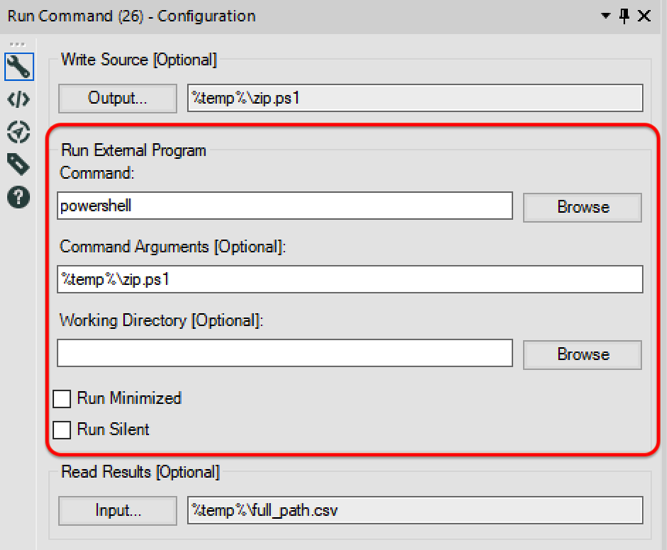
When we fill in only the ‘Command’ setting with a program name, the workflow will just open it. To make this program do something else we need to also fill in the second setting called ‘Command Arguments’. In my case, I want PowerShell to execute the script from the zip.ps1 file located in the temporary folder. Going back to the example of launching Tableau, we may fill in this configuration with a path to a specific workbook that we want to be opened by Tableau.
Depending on the program we are running, we might need to specify the working directory for it. We can run it in a minimized window or in silent mode. Since I wanted to see what’s happening in Windows PowerShell, I didn’t tick these boxes.
Configuring ‘Write Source’ and ‘Read Results’ Settings
Before we have a closer look at the ‘Write Source’ and ‘Read Results’ settings let’s once again go through my example to understand what the workflow does and why I need Run Command tool in there.

1) Download tool downloads .zip files and writes them into temporary .tmp files to the temporary folder.
2) Run Command tool executes PowerShell script which takes these .tmp files, changes their extension to .zip files and unarchives to “C:\temp” folder. The script also creates a new .csv file that contains the list of all extracted file names.
3) Dynamic Input tool reads the list of data sources from the newly created csv.file that contains names of all unarchived files.
Incoming Connection means ‘Write Source’ setting needs to be configured
Run Command tool needs to have an incoming connection because the PowerShell script has to be dynamically updated with the temporary file path. I update my script with the temporary variables in the formula tool.
Full disclosure: I used Google and Windows PowerShell ISE to compose and test my script first.
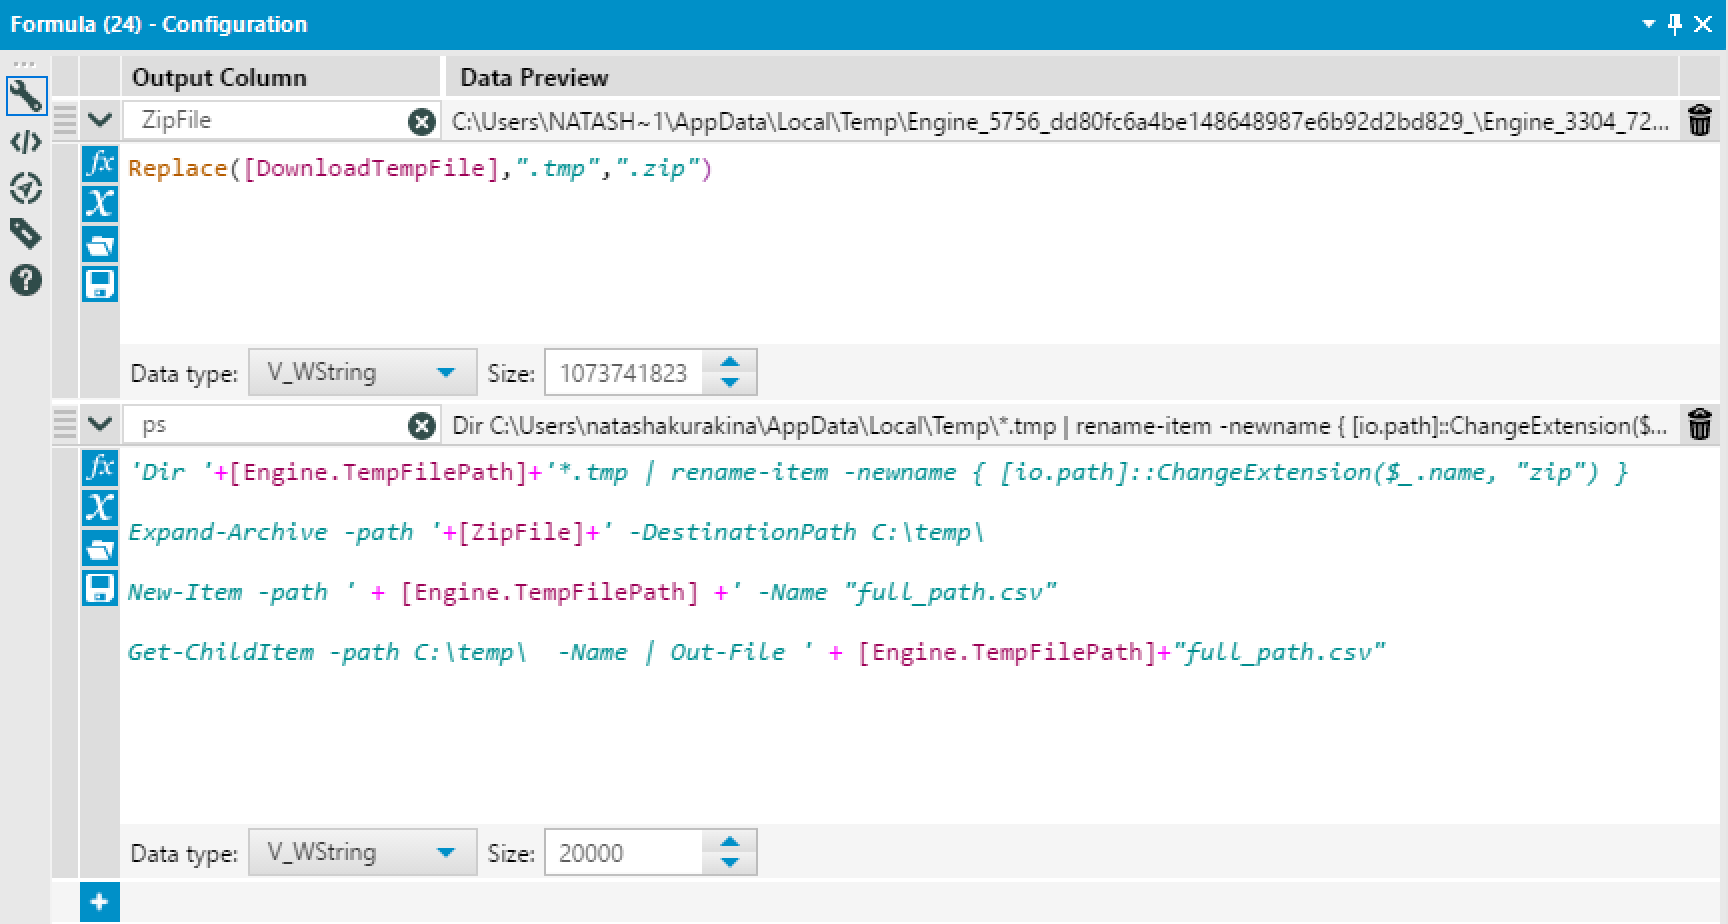
Windows PowerShell is an external application and it can’t read any data directly from the workflow, so firstly we need to output the script. In this case, Run Command tool acts as an output tool and the Write Source output needs to be specified.
My Run Command tool outputs PowerShell script into zip.ps1 file located in the temporary folder. Since I want PowerShell to also execute this script, I specify the same file under the Command Arguments.
A note of caution: Everything from the incoming connection will be written to the output, so I use Select tool to leave only one column containing the script.
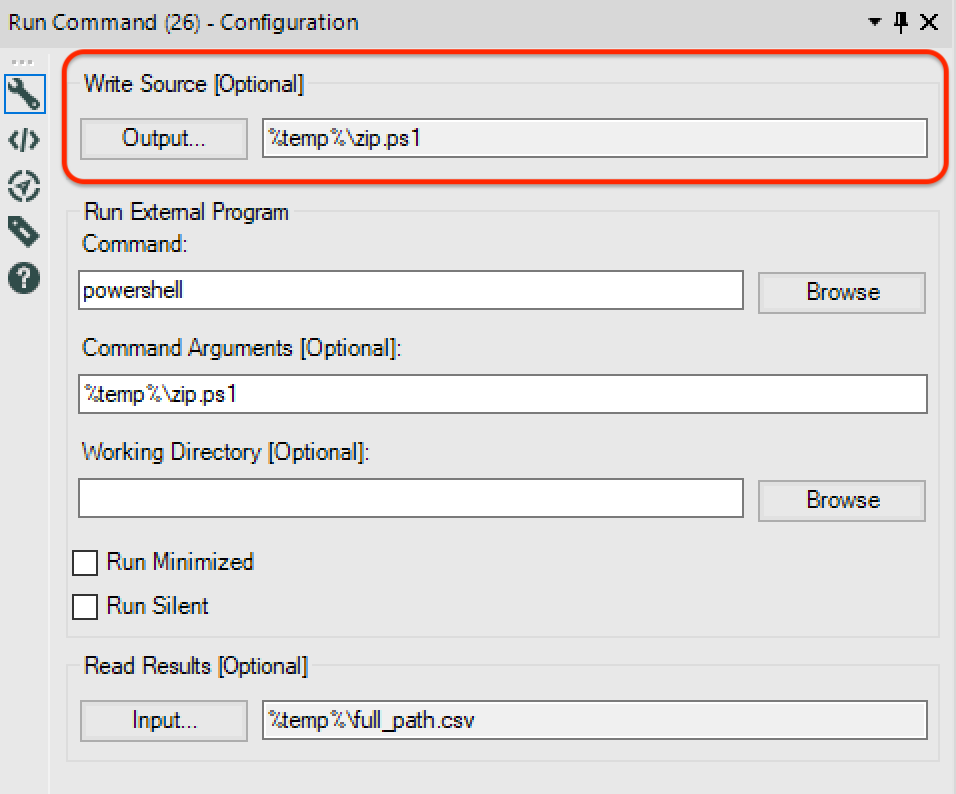
If we only want to unarchive files, and for example use them in some other workflow, the above configuration will be enough. It will create a file with the script and launch PowerShell to execute it. Run Command tool acts as an alternative to the Output tool and doesn’t require any outgoing connection.
Outgoing Connection means ‘Read Results’ setting needs to be configured
Since I wanted to input data from the unarchived files immediately in the same workflow, I needed Run Command tool to act as an Input tool. In this case I had to specify ‘Read Results’ configuration.
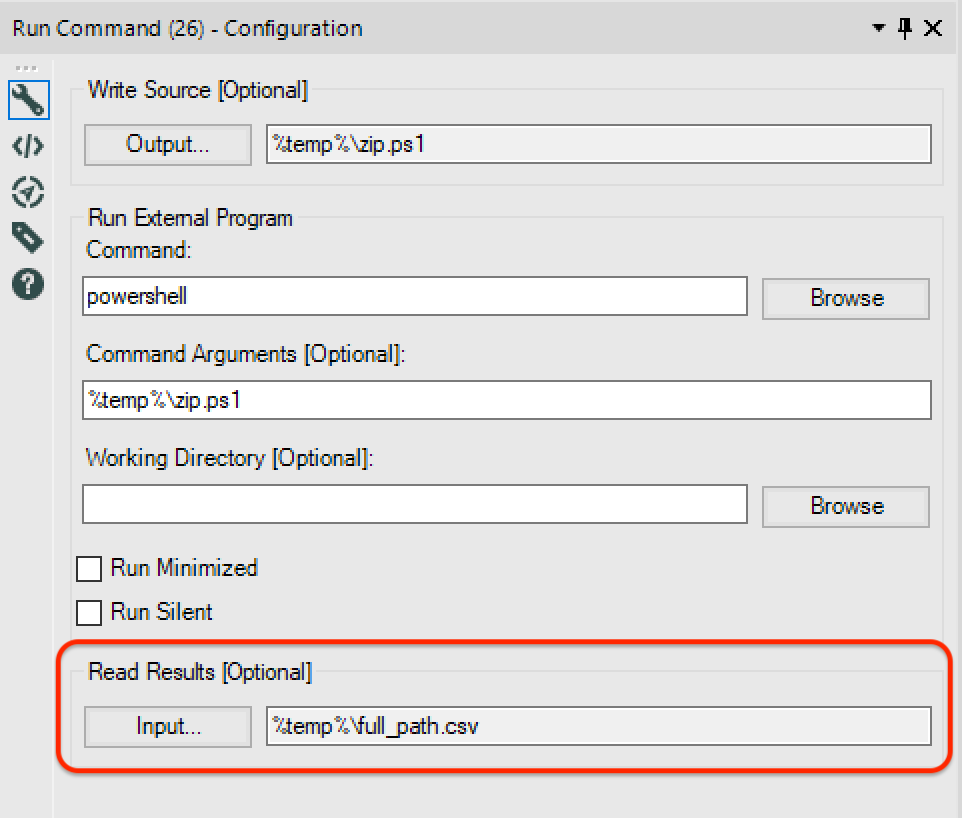
The .csv file is created by PowerShell script and contains the list of all unarchived files. Run Command tool acts as an Input tool and reads this file into the workflow. The inputted field is then used in the Dynamic Input tool as a List of Data Sources.
Closing notes
While the configuration for the Run Command tool works fine in this workflow, I would like to add a few notes related to the above workflow in general.
1) Dynamic Input still needs an input data source template, so there has to be an existing file on the computer. This is not ideal and still needs improvement.
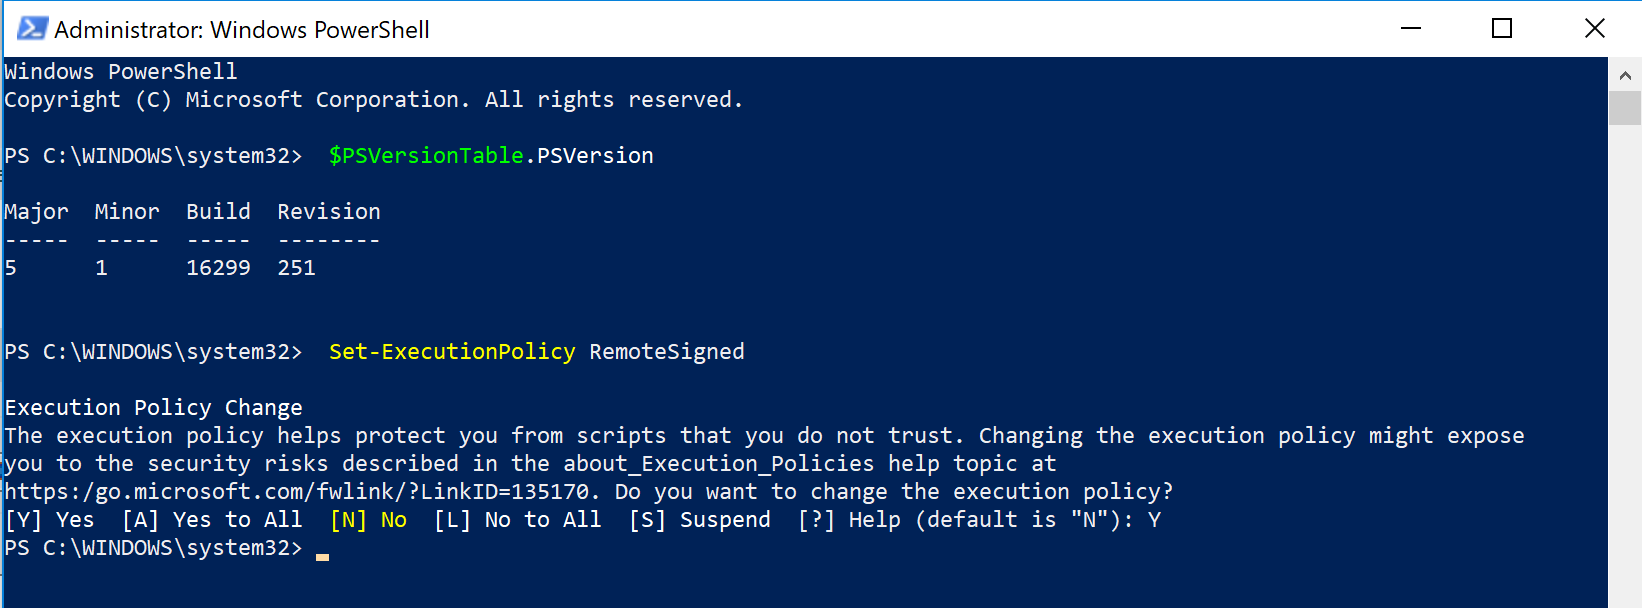
2) Using PowerShell scripts instead of batch files can potentially run into several pitfalls, as it’s often locked down and older windows will have older versions of PowerShell:
- to check version in PowerShell run $PSVersionTable.PSVersion
- to allow PowerShell to load and execute files change the execution policy, as an admin run Set-ExecutionPolicy RemoteSigned

Hi Natasha, this article was super helpful to me, thank you.
I do have one issue, I put “powershell” into the Command parameter as you illustrated. However, I’m getting this error when I run the workflow: Failed to run external program “powershell”: The directory name is invalid.” I’m using Alteryx version 2018.4 and my powershell version is 5.1. Any ideas what is causing this initial error?